I never waxed my first pair of skis. I didn’t know any better. Twenty years later, they are still viable skis. But most avid skiers do wax their skis (and for good reason). With the right wax, your glide improves and the ski base is protected, allowing them to perform better, longer. There’s a saying: “Take care of your gear and it will take care of you.” But how? For me, waxing skis was intimidating. With seemingly endless options and advice, learning the process felt overwhelming as a beginner. My hope is to demystify the world of hot waxing so you can confidently prepare your skis for winter adventures.
What you’ll need
A place to lay your skis upside down, with tips and tails supported, and bindings hanging freely. My friend uses two Adirondack chairs. Many people have mounted ski clamps on their garage work benches. Apartment-dwellers might cough up $150 for a foldable waxing table, but the most portable option (and my personal favorite) is the Happy Norwegian Mr. Grippy. With a pair of these, you can wax your skis just about anywhere. If you aren’t ready to take the plunge, many ski areas have waxing rooms or huts.
A way to clean the fine wax dust you’ll leave behind. A tarp will do, or a shop vacuum. You must clean after every waxing session or you’ll quickly create an irreversibly waxy floor, which becomes dangerously slippery, very flammable, and, well… gross.
An iron. Old consignment irons work fine, but cheap ski waxing irons are even better (best bang for the buck I think). Don’t use your clothes iron unless you want oily clothes. Fancy waxing irons do the best job at fine-tuning the temperature for your wax. If you’re an average skier like me, don’t worry about fancy. You don’t ski well enough to notice the difference.
A plastic scraper. Scrapers come in multiple thicknesses. I like having a 3mm and a 4mm. The 3mm flexes just enough to get the inconsistent spots, and the 4mm provides extra sturdiness when scraping.
A plastic groove scraper. These tools, shaped like a pen, are designed to remove wax from the groove of your ski base.
A soft wire brush and a nylon brush (they also make combo brushes). Wire brushes are the only metal you should use on Nordic skis. All other tools should be plastic.
Note: There are many types of wax (like kick wax, liquid waxes, and gel waxes) as well as different types of skis. This article is specifically about hot waxing your Nordic skis using solid glide wax.
 Photo by Skye Stoury.
Advice on seeking advice
Ski waxing brings out the nerd in everyone. You will get endless opinions about all aspects of waxing, from the coarseness of the brush to the number of times you brush the ski to the temperature the wax should cool to before scraping. Generally, no advice is wrong, and over time you’ll develop your signature wax routine. Don’t let the details discourage you. For now, you’re waxing your skis! Which is better than not waxing your skis.
How long does hot wax last?
In my experience, wax lasts 10-15 kilometers on cold, dry snow. When you finish skiing, you’ll notice your bases look dry in some areas. That’s a sign to wax before your next outing, even if conditions are similar. On wet snow, wax can last 30-50 kilometers.
Hot waxing your skis
Choosing
Swix and Toko are the most commonly used brands of ski wax, but there are others like Fastwax and New Moon, and surely others I’ve not heard of. Most wax reports provide both Swix and Toko recommendations. I recommend buying three small (40g) squares of wax to start - one each of red, violet, and blue in Swix, or red, yellow, and blue in Toko. Each wax has snow temperature ranges as well as iron temperature recommendations. Don’t worry if you can’t regulate your iron temperature – your iron just needs to get hot enough to melt the wax.
Snow temperature also varies. The night before your outing, check the forecast. If there’s a wax report, follow those recommendations. Otherwise, consider the time of day you’re skiing and choose the wax based on temperature. If you’re unsure, err toward colder (harder) wax.
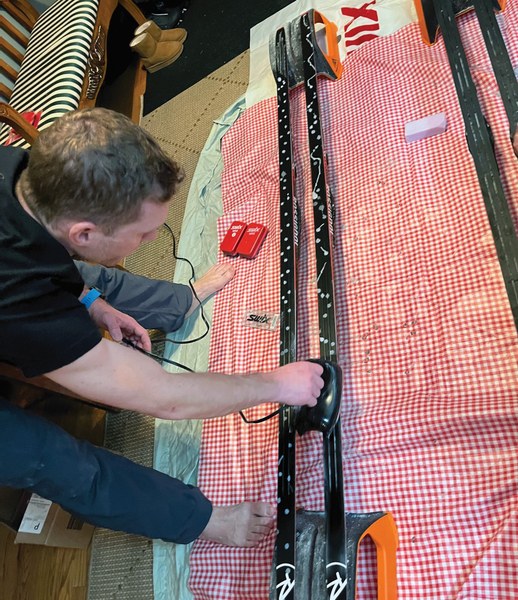
 Ironing dripped wax into the ski. Photo by Becca Polglase.
Applying
Note: wax application, scraping, and brushing are identical in both skate and classic skis. The only difference is that in classic skis, you need to avoid the “kick zone” (aka the mohair skin or the fish scale pattern).
There are two common ways to apply wax to skis. The wax-conserving but challenging method is to draw it on, also known as the "crayon" method. Rub the brick of wax on the iron, then quickly transfer the melty surface to the ski. Do this repeatedly until the ski is covered with wax (or just enough so that when you go over the wax with an iron, it will disperse to cover the whole ski).
The easier method is to drip the wax on. Hold one corner of the iron above the ski at an angle, press the brick of wax on the iron, and let the wax drip onto the ski. Experienced waxers can drop a melted sine wave down the ski in about five seconds. As a beginner, you will take longer and drip too much wax. That’s okay – you’ll improve with practice.
Once your ski is covered with wax (whether “crayoned” or dripped), move your iron up and down the ski until the wax melts evenly. Treat the ski like your clothes and keep the iron moving so as not to burn the ski.
Cooling
Let your skis completely cool before scraping.
Note: The colder and harder the wax, the more difficult it is to work with. If I’m using super cold wax, I prefer to do an initial scrape while the skis are warm. (But I’m sure plenty of people would disagree.)
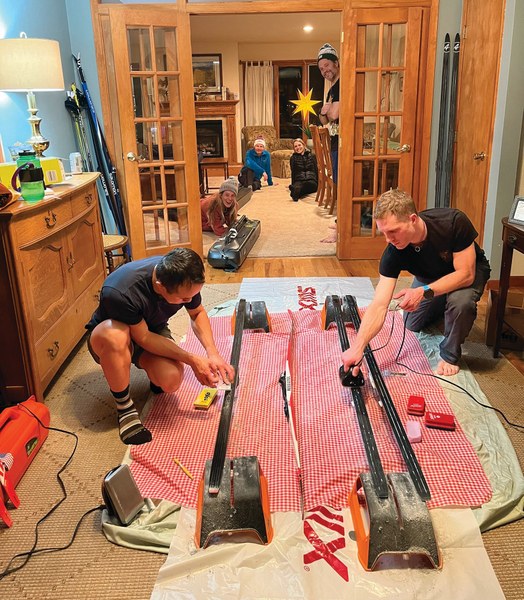
 Ski waxing using Mr. Grippies and a sheet/tarp combo to protect the floor. Photo by Becca Polglase.
 Scraping cooled skis with a plastic scraperl. Photo by Becca Polglase.
Scraping
First, use the groove scraper to remove wax from the groove(s) of your ski, scraping tip to tail. I prefer to do this first so if I slip out of the groove, I don’t mess up the ski after I scrape it. Then, using your plastic scraper, scrape the entire base from tip to tail. Continue scraping until no more wax will scrape off. Scrape the edges too.
Brushing
Using your brush, press down firmly on your ski, brushing tip to tail about 10-15 times. Like sanding, brushing creates fine dust and makes your skis smooth and shiny. If you have a metal brush and a nylon brush, do this twice — first with the metal, then with the nylon. When you’re done brushing, don’t forget to clean, otherwise the fine wax dust will embed into your floor forever and you’ll quickly have a slippery ice rink.
Skiing
Congrats! Your skis are waxed and you can enjoy the fruits of your labor. Some days your skis will be fast, other days you’ll wonder if you made the wrong wax choice. The truth is, some days the snow is slow, some days you are slow, and some days the wax, the snow, and your body align for speed and grace on the trails. Variability is all part of the fun.
This article originally appeared in our winter 2025 issue of Mountaineer magazine. To view the original article in magazine form and read more stories from our publication, visit our magazine archive.
 Becca Polglase