Trip Report
Mount Rainier | Gibraltar Ledges + Ingraham Direct
Single push attempt up Gibraltar Ledges and down Ingraham Direct.
- Sat, May 4, 2019 — Sun, May 5, 2019
- Mount Rainier/Gibraltar Ledges
- Climbing
- Turned Around
-

- Road suitable for all vehicles
-
The Gibraltar Ledges route will not likely be viable for much longer this year. The crux of the route, the ledge itself, is currently in fine condition. There were a few short (3-6ft) sections that required using crampons on rock/scree, but overall it was snow-covered. The snow was soft, and offered little to no security for any type of protection.
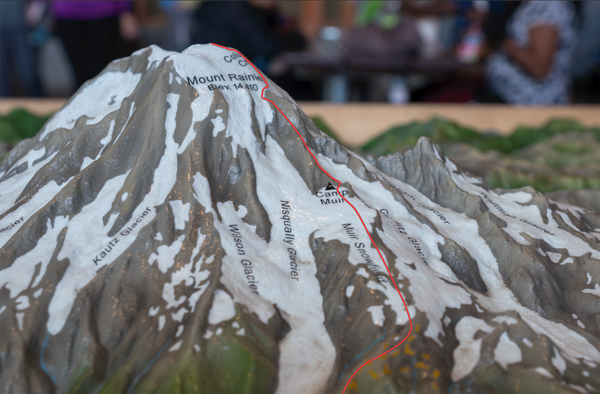
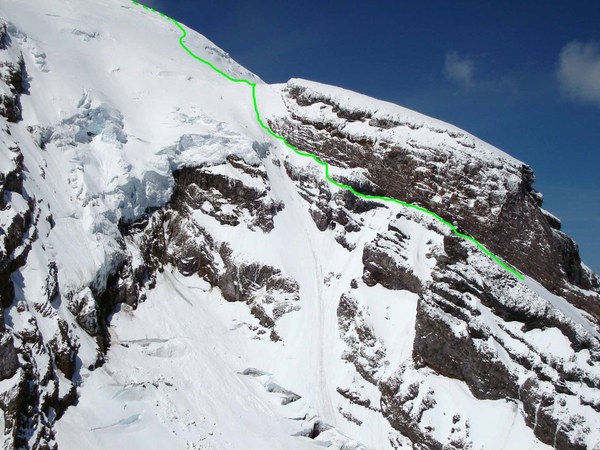
A car-to-car attempt on Mount Rainier via Gibraltar Ledges, early in the climbing season- that was the mission! Marlisa and I picked Gibraltar Ledges after getting some feedback from some of our Mountaineers mentors. Our initial plan was Ingraham Direct, but we switched ascent routes to Gibraltar Ledges because we would only be traveling as a team of two and preferred to contend with rockfall, rather than crevasse rescue (more on both concepts later). We still planned on descending via Ingraham Direct. The weather was forecasted to be really nice. All sources were in agreement that it should be mostly sunny on both days and probably windy beginning overnight and carrying into Sunday. Temperatures would be ~60F in Paradise, ~32F at Camp Muir, and ~15F at the summit during the day, with an overnight low of ~12F at the summit (~-5F with wind chill). Around 10 inches of snow fell on Mt Rainier a week prior, and the week brought warm temperatures that consolidated the snow, but left wet conditions. Avalanche risk was expected to be low, but unpredictable. Wet slides had been observed in the region over the preceding week. All in all, the conditions were good
GEAR:
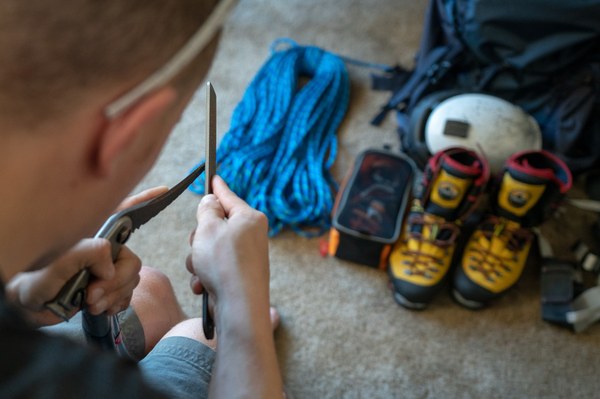
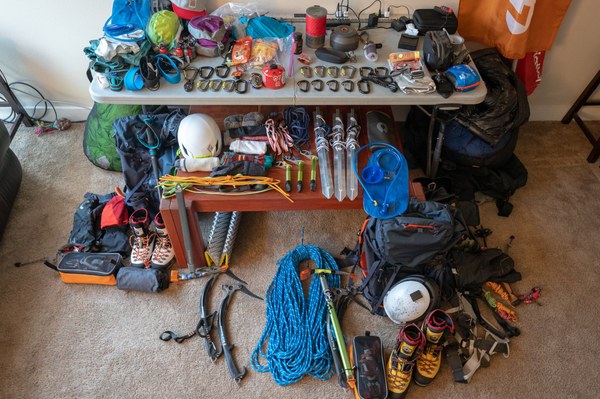
I'm going to be specific about gear, because I think it's what we probably spent the most time thinking about and planning before the climb. Skip it if you don't care, but if it's helpful for you in your own choices, excellent!
(10 E kits not listed but present. Duh.)
| Team gear | |
| Pickets |
(3) SMC 24" + Mammut Contact 120cm Dyneema sling + BD Oz Hoodwire
|
| Ice screws |
(3) BD Ultralight 13cm, 16cm, and 19cm (one each size)
|
| Alpine draws |
(3) Mammut Contact 60cm Dyneema sling + BD Oz Hoodwire
|
| Cordalette |
(1) 20ft 7mm Mammut accessory cord
|
| Stoves |
(2) MSR Windburner, MSR MicroRocket (+ GSI Halulite kettle)
|
| Water filter | MSR Trailshot |
| Fuel |
(2) One 3oz MSR + one 6oz MSR cannister
|
| Rope |
Mammut Twilight dry 7.5mm x 70m
|
| Sat tracker |
Garmin inReach Mini
|
| Battery |
RavPower 10,400mAh
|
| - | |
| Greg's gear |
|
| Pack |
Osprey Mutant 52
|
| Harness | Petzl Tour |
| Ice axes |
BD Raven (shortened to 58cm) + BD Cobra (rented), BD Slinger leash
|
| Crampons |
Petzl Lynx w/semi-auto setup
|
| Carabiners |
(3) BD Oz Hoodwire, (3) DMM Phantom lockers, (2) BD Magentron Vaporlock
|
| Cords |
(2) hero/prussik loops from 5mm Mammut cord, (1) Texas Prussik setup
|
| Personal anchor |
Sterling Chain Reactor
|
| Sleeping bag |
Mountain Hardwear 600 fill down, circa 2006
|
| Sleeping Pad |
Thermarest NeoAir XTherm regular
|
| Sit pad |
Four segments cut off a Z Lite foam pad, and narrowed by ~6 inches
|
| Water |
3L Camelbak, 2L Hydrapak Seeker, 1L Nalgene in a neoprene sleeve
|
| Head lamp |
BD Spot Lite 160 (primary) + BD Storm (backup)
|
| Helmet |
Mammut Wall Rider
|
| Sunglasses |
Julbo Montebianco
|
| Trekking pole |
Loki something
|
| Boots |
La Sportiva Nepal Cube GTX
|
| Socks |
(4 pair) Darn Tough Mountaineering extra cushion, over the calf
|
| Knee sleeves |
Rehband 5mm (I'll come back to this)
|
| Pants |
Outdoor Research Cirque
|
| Underwear |
Duluth Trading Buck Naked Performance Briefs
|
| Base layer |
Patagonia Capilene Cool Daily Hoody
|
| Mid layer |
Patagonia R1 (done in an R1)
|
| Outer layer |
Patagonia Micro Puff Hoody
|
| Shell layer |
Arc'teryx Alpha AR
|
| Big Puffy (tm) |
Patagonia Grade VII
|
| Buff | Buff merino |
| Gloves | BD Guide |
| Mitts |
OR Alti Mitt (shells only, worn with insulating layer from BD Guides)
|
| Warmers |
Grabber toe warmers + hand warmers
|
| - | |
| Marlisa's gear | |
| Pack |
Osprey Mutant 52
|
| Harness | BD Coulior |
| Ice axes |
BD Raven (60cm) + BD Cobra (rented), BD Slinger leash
|
| Crampons |
Petzl Lynx w/semi-auto setup
|
| Carabiners |
(3) BD Oz Hoodwire, (3) DMM Phantom lockers, (2) BD Magentron Vaporlock
|
| Cords |
(2) hero/prussik loops from 5mm Mammut cord, (1) Texas Prussik setup
|
| Personal anchor |
Sterling Chain Reactor
|
| Sleeping bag |
Marmot Angel Fire 25F 650 fill down
|
| Sleeping Pad |
Thermarest NeoAir XLite regular
|
| Sit pad |
Four segments cut off a Z Lite foam pad, and narrowed by ~6 inches
|
| Water |
3L Camelbak, 2L Hydrapak Seeker, 1L Nalgene in a neoprene sleeve
|
| Head lamp |
BD Spot Lite 160 (primary) + BD Storm (backup)
|
| Helmet | BD Vector |
| Sunglasses |
Julbo Montebianco
|
| Trekking pole |
BD something
|
| Boots |
La Sportiva Nepal Cube GTX
|
| Socks |
(4 pair) Smartwool Expedition + (4 pair) merino liners
|
| Knee sleeves | Rehband 3mm |
| Pants |
Fjallraven Keb Trouser
|
| Base layer |
Patagonia Capilene Cool Daily Hoody
|
| Mid layer |
Patagonia R1 (done in an R1)
|
| Outer layer |
Patagonia Micro Puff Hoody
|
| Shell layer |
Arc'teryx Alpha AR
|
| Big Puffy (tm) |
Patagonia Grade VII
|
| Gloves | BD Guide |
| Mitts |
OR Alti Mitt (shells only, worn with insulating layer from BD Guides)
|
| Warmers |
Grabber toe warmers + hand warmers
|
| Miscellaneous |
She-Wee
|
TRIP:
We left Tacoma at 12pm. We had planned to leave around 1pm, but we were too excited and couldn't find anything else to distract ourselves with so we left an hour early. The drive was uneventful, but there was about a 15 minute line of cars at the park entrance. When we got up to Paradise we took a lap through the parking lot at the Visitor's Center, but there was no hope of finding a spot, so we backtracked down to the overnight lot (the bottom of the pickle).
You need three things to climb Mt Rainier (legally): Pay the climbing recovery fee, a camp reservation, and a climbing permit. We paid the recovery fee online, and we wouldn't need a camp reservation because we wouldn't be bivying, but we did still need to register to climb. This is free, and can only be done in person at the Climber Information Center. We didn't realize that the Climber Information Center isn't the same thing as the Visitor's Center. After being rebuffed by the Ranger at the information desk (poor guy, trying to tell someone not to climb to Camp Muir in sneakers (probably for the hundredth time that day)), we went on the hunt for the CIC.
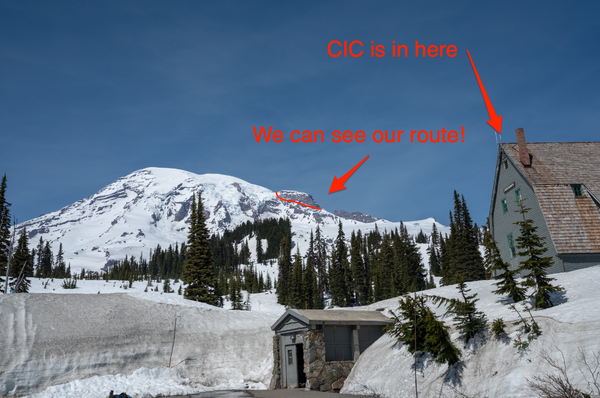
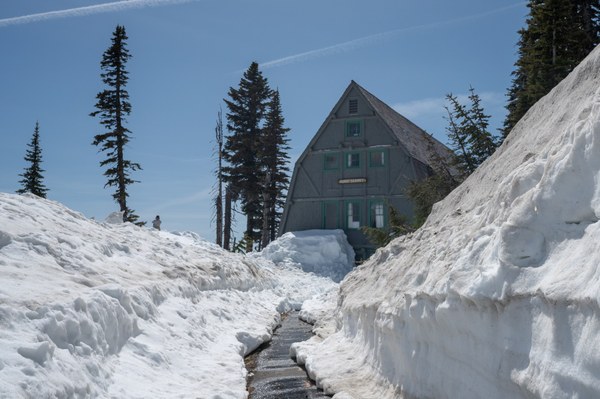
The directions we got were "across the parking lot, but not right across the parking lot, as if you were going to the Inn, but you're not going to the Inn, kinda past it, but not really past it...." 45 minutes later, we finally found the CIC inside an A-frame building marked "Guide Services". It's clearly visible from the Visitor's Center, at the top of the hill directly across the parking lot, for anyone in the future who needs this information. Jason, the Ranger manning the desk in the CIC, was easy going, and got us squared away in a few minutes. He did check to see our receipt for the paid Recovery Fee, and made sure we knew to check out when we got off the mountain. He actually reserved us a spot at Camp Muir, just in case.
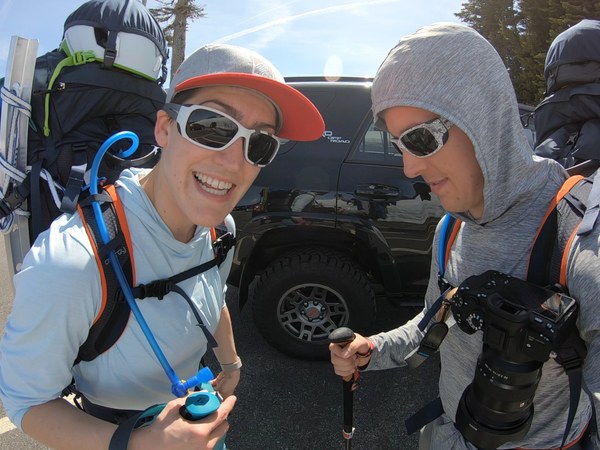
Cleared hot, we walked back to the car and got suited up. We each had 6L of water capacity, but only filled our 3L Camelbak bladders. We took one final picture of ourselves by the car, so there was at least record of us at the trailhead.
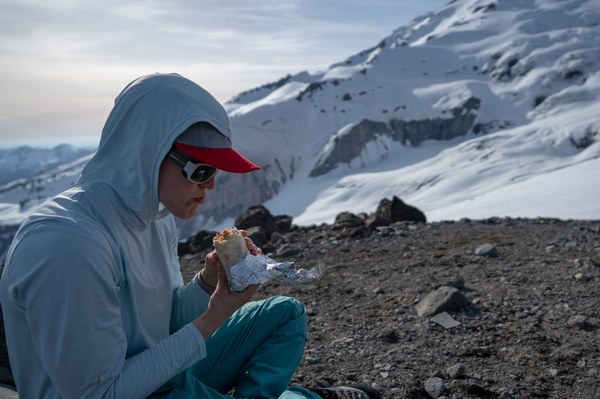
We left the parking lot at 3:28pm, and headed up what might have been the Skyline Trail. We planned to be at Panorama Point by 6pm, and Camp Muir around 10pm. Snow conditions were slushy and deep so we were up to our ankles and shins often, and our knees occasionally. We immediately wished we had brought ANY kind of floatation (we own snowshoes!), the first of probably 600 times we had the same wish before we would be back at the car 24 hours later. The climb to Pan Point was unremarkable, except that there were lots of people out there. We arrived at Pan Point around 5:40pm and spent 20 minutes eating and drinking, and adjusting gear and layers. Marlisa picked a choice spot to pee.
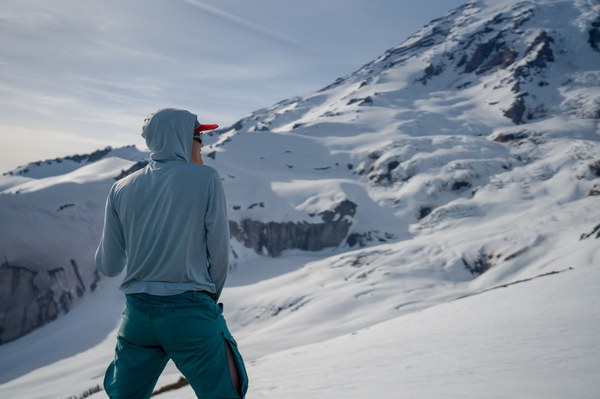
At 6pm we moved off from Pan Point, and started working on the Muir Snowfield. The Muir Snowfield is LONG. Details about the snowfield are thin in most trip reports and guidebooks, and now I know why. There's really nothing to say about it. It's a miles-long slog up a snowy...field. You get a great view of the mountain the whole time, and you can see Camp Muir at most points... it just never seems to get any closer. The barrenness of the Muir Snowfield makes Camp Muir feel close, but never closer. That said, the 4.5 hours it took us to grind our way through the snowcone-type conditions passed quickly. We really only stopped to put on layers right as the sun was going down.
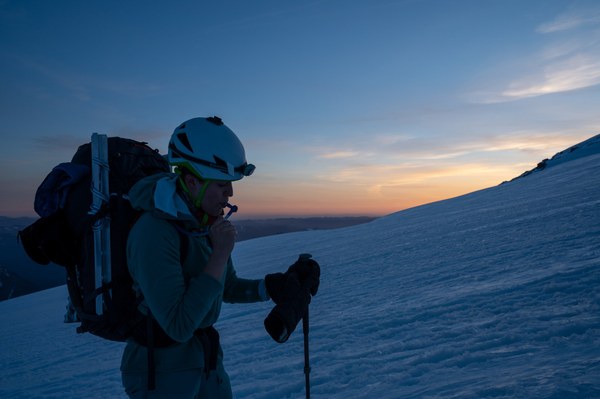
Once the sun went down we navigated by looking for the black hole in the stars and aiming kinda to the right side of it. The wind picked up at about 9pm, blowing about 15-20mph. We'd never been to Camp Muir before, so when we walked into camp we didn't know what we were looking for aside from a sheltered spot out of the wind. We stumbled around a couple buildings (the guide huts, as we found out on the way back) until we found a rock wall that was sufficient for our needs. We put on all our layers and hunkered down on our sit pads with two stoves turning snow into water. We also changed our socks. Each of us had packed four pairs of socks, planning on changing them every 6 hours.
My thoughts on chemical warmth: While packing, we rolled a pair of toe warmers into each pair of socks. I've used toe warmers on my three most recent trips, adhered to the tops of my toes outside my socks. I'm an evangelist for this method now. My feet have never been so comfortable in the cold before. The warmers only get to about 90 degrees F, so they aren't meant to be hot. They're meant to provide an additional source of warmth in the boot, so your cold feet aren't simply insulated ice cubes. I've found they work perfectly for this purpose. I also put hand warmers inside my gloves, against the back of my hand along my knuckles. This was the first trip I've tried this method, but again I think I'll keep it around as a mainstay technique. When removing gloves for using the GPS, handling hardware, or other intricate tasks, they would be warm-ish when I put them back on. Despite the biting wind and cold temperatures, neither my hands nor my feet ever felt cold on this trip. That's a huge win for me, in terms of my comfort on these kinds of objectives.
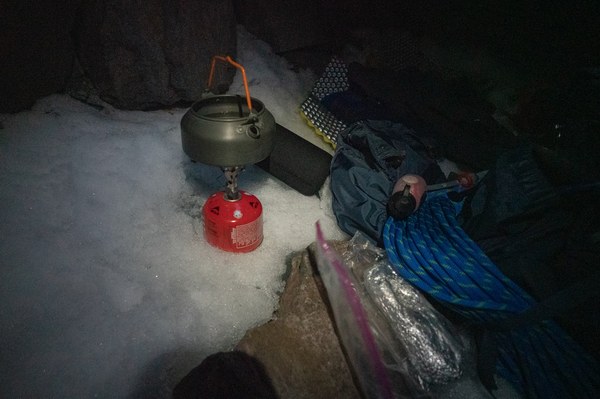
It was around 10:30pm when we arrived at Muir, and we wanted to be on the move again by 11:30pm. It took us longer than that to make water, eat our food, and get our gear in order. Speaking of water, we opted to only melt snow, and then filter with the MSR Trailshot in order to save time (instead of full boil). It was our first time using the Trailshot and we are majorly impressed. Super easy, fast, packable, light, cheap. We can't really think of any downsides. Having used the other MSR and Katadyn pump-style filters before, the Trailshot was a gamble that we won. We used both stoves at once, which was perfect. Either stove alone would have taken too long to melt enough snow for each of us to get the 4L we planned.
Side story: I was on Mt Rainier with Scott Schissel a week prior to this attempt. He was telling me about the guides in Peru who, when needing to provide a client with a morale boost, mix Tang with boiling water to make hot Tang. The idea sounded crazy to everyone in the group who heard Scott talk about it, but considering the nearly religious admiration Scott seemed to have for Hot Tang, we all had reason to wonder if there was something behind it.
Back to present, Camp Muir: For a few reloads of the stoves, I let the water get actually hot. Not boiling, but I-wouldn't-drink-it-yet hot. I filtered each pot progressively into my Camelbak, which I had stashed against my baselayer, inside my four other layers. Once the Camelbak was full, I put five orange-flavored Nuun drink tablets (caffeinated variety!) into my Camelbak, careful to vent the cap until the fizzing was done. Not quite Tang, but necessity breeds invention. Oh boy! I had myself some "Hot Tang"! And it was so m-f'in good! I wrapped my Camelbak into my Big Puffy like a baby in a swaddling cloth, and placed my insulated precious cargo at the top of my pack, where she would stay nice and hot for the remainder of the ascent. I was about ready to go storming all over Mt Rainier at this point, so we made the conversion from we're-out-for-a-snowy-stroll to let's-not-die-on-a-glacier-today. We popped a couple caffeine pills and out came the ropes, axes, crampons, harnesses, and all the other sexy jewelry this activity demands. We were actually both feeling really darned good, so we didn't really discuss whether to keep going or not but we completed the requisite team check-in.
Planning note: We spent A LOT of time debating the two-person rope team thing leading up to this trip. Eventually, we decided to learn two-person glacier systems and strategies, and make a decision from there. We researched, talked to mentors, read, and eventually practiced travel and rescue techniques that are two-person specific. We made a decision to go with it, after weighing the complications and risks. Our rope system was to use a 70m rope with up to 14m spacing between us, depending on terrain. We would space off the middle mark of the rope, leaving each of us with 28m+ of rope on a coil for use in rescue. We practiced drop pulley and c-z pulley systems. We put figure-8s on bights on the ends of the rope, which went to auto-lockers on our belay loops, and then coiled down to our spots on the rope. After securing our coils, we put another figure-8 on the rope to the same locker. In a rescue situation, this would mean that we could exit the loaded rope system easily, without having to untie any knots. On the glacier, we tied alpine butterfly knots every ~2m between us to assist in arresting a fall. These would be removed for the use of running protection.
While on the Muir Snowfield, we never saw the approach to Gibraltar Rock or the namesake ledges because the route was obscured by the Cowlitz Cleaver. We knew the route could be some climber's choice gradient between right up the middle of the upper Cowlitz Glacier and on the hairy ridge of the cleaver, looking down on the Nisqually Glacier some hundreds of feet below. Our rationale was to avoid the glacier because of possible crevasse risk (however small), and to avoid the cleaver because it was night time and we didn't want to descend the mountain too fast. We left Camp Muir at 12:30am and, lacking a better heading, decided to head vaguely in the direction of "uphill". We faded climber's left on the glacier, hugging the cleaver. We really didn't know how close we were to the cleaver until our headlamps hit rock. The wind had picked up even more, reaching a gusty 30mph, possibly faster. We couldn't really talk to each other, and we had to take care to always be in a stance that wouldn't get us blown off the slope. Today, we both have wind-burned lips and noses. The climbing was much steeper than anything before on the route. There were sections that were between 40 and 45 degrees. That said, the colder temperatures and wind had firmed up the snow by now, and it was like kicking into styrofoam. Axes made perfect self-belays, and we made slow but consistent progress.
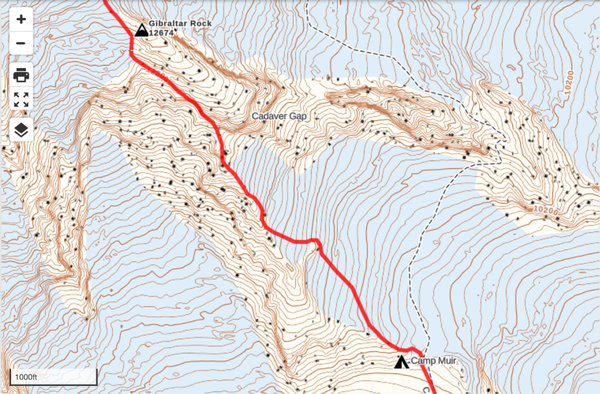
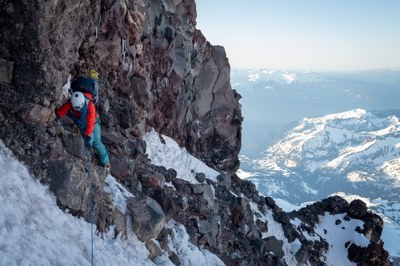
We had planned on being at the start of the ledge by 2am (assuming moving by 11:30pm), but we didn't make it there until 4:30am. In fact, we didn't even know we were on the ledge itself until the morning alpenglow started and gave us a little bit of visibility. The on-ramp to the ledge tucks you behind some rocks, offering shelter, then you pop out and see the exposed sections. We were actually glad to be be there in the pre-dawn light, because being able to see the mountain, and look down on the Nisqually Glacier while perched on the ledge was pretty magical. The ledge varies in width from about 20ft, down to about 3ft. Most of the ledge is approximately 15ft wide and slopes away from the rock at about 20-40 degrees.
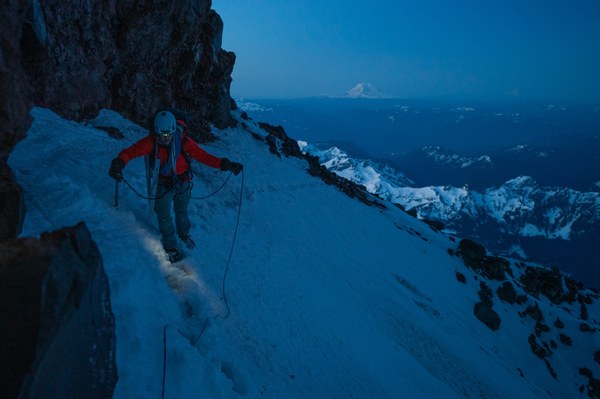
For our traverse, the snow was in pretty awkward condition. In winter, this section is known to have ice (hence the ice screws), but we didn't find any. We were told two tools would be a good idea, but we didn't need two. I switched to the BD Cobra so I could laugh about feeling like White Goodman in Dodgeball.
The snow was also too thin and rotten to get a good picket in. We did place running pickets for about 50m, but gave up on it after the fourth inch-worm maneuver. The truth was that the pickets were adding little to no security given the snow conditions. We simul-climbed the rest of the way. There are places where you have to go up and over, or around, bare rock bulges. Here, we were extra deliberate with our crampon placement, and we got to wedge our axes in some cracks. The rock was crumbly and wasn't attached very well, so it was a methodical game of balance. It was fun getting a little more technical on the route.
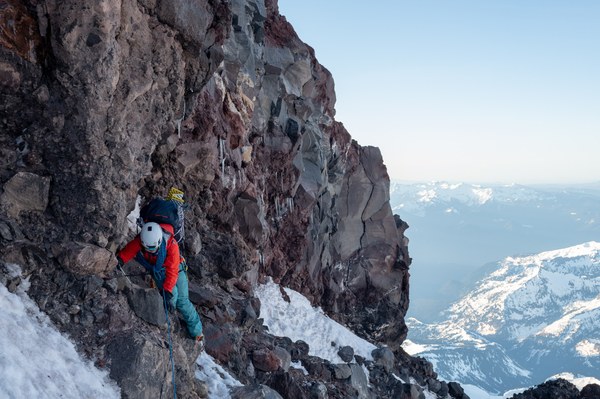
For most of the ledge section, it's obvious that an uncontrolled fall downslope would likely result in catastrophe. It just isn't wide enough to provide ample time for self-arrest, and it's steep enough that tumbling to a lucky stop wouldn't happen. In my mind, a foot sliding out on bad snow wasn't going to cause problems, but if you hooked a crampon in a pant leg and sprawled yourself, you probably wouldn't stop for a couple thousand feet. If you put blinders on, and only knew about the stuff within 10ft of you, the climbing was not difficult nor really even very technical. Expanding that assessment out to include the ramifications of a mistake, and including the fact that the route seemed somewhat unprotectable in present conditions, made the ledge fairly exposed. Decidedly the crux of the route, the ledge is appropriate for climbers who can move in a deliberate and coordinated manner and have a high mental tolerance for the risks inherent of being in that situation. Out of 10: skill - 2, exposure - 7. The ledge took us about an hour to traverse, and we reached the Gibraltar Ice Chute around sunrise at 5:45am.
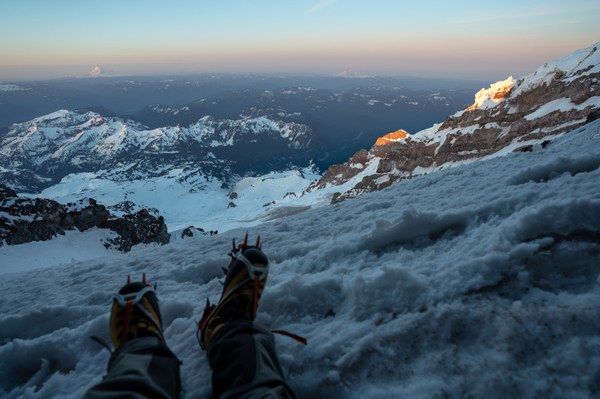
Climbing up the ice chute was the second part of the route that we were wary of, due to the reputation we heard, and lack of information found while researching. We had heard it really lent itself well to two ice tools and ice screws for protection. If climbed closer to dead winter, I think that is probably true. In the shape it was in when we were there, one axe in high dagger position worked just fine, and an ice screw would have been little more than decoration. We left the rope on, but realistically a slide of the other partner, if not caught at the onset, would have brought us both down the chute. Like the ledges, the ramifications of a mistake were looming, but the climbing was secure. Kicking steps was very effective in the early morning snow, and it was just a matter of getting more of the mountain underneath us. At one point, Marlisa thought she heard me yelling something to her, so she pulled her face away from the snow wall and looked up. "What did you say?!" she yelled upwards. "HOT TANG!!!" rang out over the howling wind.
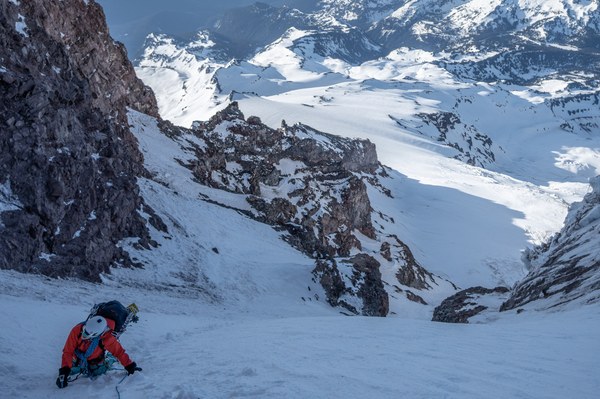
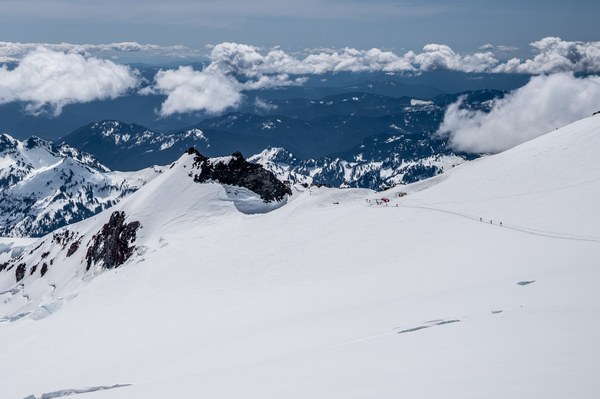
We finished the chute around 6:45am and stopped for breakfast (Brewer's Row chorizo verde breakfast burritos) next to a small melt stream visible in a hole in the glacier, with a view of where our route would intersect the Ingraham Direct route. We could see the rest of the route up to the crater. We also spotted a couple teams who had chosen the Ingraham Direct route making their way up the last grinder slope to the top. For the last couple thousand feet, Marlisa had been coughing and wheezing a little. Not enough to be alarming, but noticeable for sure. We were both feeling the sleep deprivation, but overall we were in very high spirits. We climbed to the meeting point with the ID route and headed straight up-glacier for 250 vertical feet. I could feel the rope tugging behind me, so we switched places, letting Marlisa set the pace. Another 320ft up, Marlisa stopped and went to a knee. I forced another team assessment. Marlisa's symptoms were worrying: wet cough, wheezing, shortness of breath, light headedness, and fatigue. She was having a hard time getting a full breath after moderate exertion. At this point we were at 13,220ft, having already climbed 7,820ft, with about 900 feet to go to the crater rim and another 290ft to the summit. The decision was easy, but obviously it didn't feel good. On some level you know you're not really choosing whether you should turn around or not. You already know you should, but you're deciding whether or not you should do that dumb thing that you want to do that defies logic. You put so much time, effort, energy, and desire into something like a direct ascent of Rainier, and you just don't want it to be over in a matter of minutes when you're that close to the top. We turned around.
We're climbing partners for life and we like it that way. Failing to sign the summit register wouldn't rob us of any of the fun we were having, huddling next to what we discovered was the guide hut at Camp Muir, making Hot Tang in the raging wind, climbing a route in a fast style that appealed to us, on terrain that we couldn't find *quite* enough information about. We succeeded in climbing a fun and exposed route on an iconic mountain, only leaving off the last miserable slog at the top. The mountain will be here, and we'll be back.
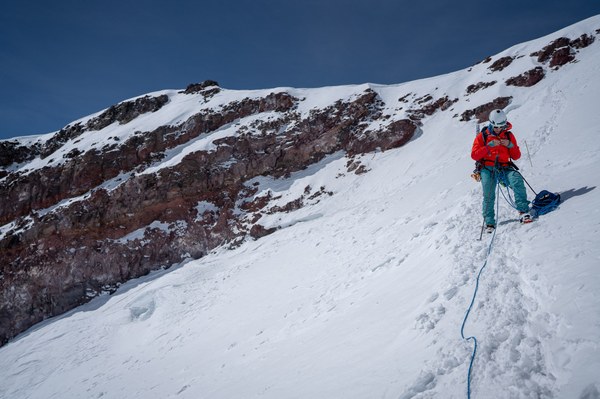
We descended via the Ingraham Direct route, as planned. The route was wanded the entire way, but the going was not fun. The route was pretty steeply laid, and the boot pack was blown out and slushy. There were no ladder steps to descend on, so it was a slippery mess going downhill. We did get to see the back side of Gibraltar Rock, which was amusing to us. The ID route, as of today, has four crevasse crossings, each under 3ft wide. Two of them were step-overs, one had a board, and one had a ladder. There are some monsters on the Ingraham Glacier right now, which are really neat to admire as you climb up/down past them. Ingraham flats had about 10 tents set up in two different parties. There was one cute hairline crevasse on the Cowlitz Glacier that you probably couldn't have fit your hand in, but it was still marked. Camp Muir was lively and it was fun looking around in the daylight and matching things up with what we had seen via headlamp the night before.
We trudged into Muir, exhausted, and just let our packs pull us over backwards into the snow on the bank facing the snowfield. We must have been a sight, because one of the climbing rangers approached us and started asking seemingly interest-based questions like "what route did you guys do?" then proceeded to the important ones like "Do you have water?" "Do you have stoves to make more?" "Are you injured". He admitted to us that we looked completely worked when we got to camp, and he wanted to check in on us. We were able to Glissade quite a few sections of the snowfield back to Paradise, but a glissade the entire length of the snowfield couldn't have gotten us back to the car as fast as we wanted to get there. We were tired, hungry, and ready to get our darn boots off. We got back to Paradise, slipped our check-out slip under the door of the CIC, and got burgers at Bruno's before heading home to pass out.
Today we're both in high spirits, good health, and fully stoked to crush whatever our next adventure is.
Some lessons learned:
- Our gear systems, fitness, and plan were all dialed nicely. We were well prepared.
- We snagged our neoprene knee sleeves out of our gym bags as an afterthought on the way out the door. I think this will become a mainstay of our big objectives. We both have great knees still, but the added stability was nice. The real benefits were that they functioned somewhat as leg warmers, being insulators, and meant we didn't have to wear long underwear. They also provide some padding if you decide to kneel on rock or in snow. They go unnoticed under pants, and we left them on from the moment we left the car to the moment we got back to the car.
- As badly as we wanted our Camelbaks to work for us in the cold, and as diligently as we tried to blow air back up the hose, we both still got frozen feed tubes. We were able to thaw them out by sticking them in our jackets, but ultimately this is something we need to improve on.
- We don't know for sure if Marlisa's symptoms were altitude related, but that's our guess. We've climbed 14ers in Colorado before with no issues, but we were living at 5,000ft ASL. We'll have to pay close attention and see if we can find a correlation in the future.
- HOT TANG!!!
 Greg Overton