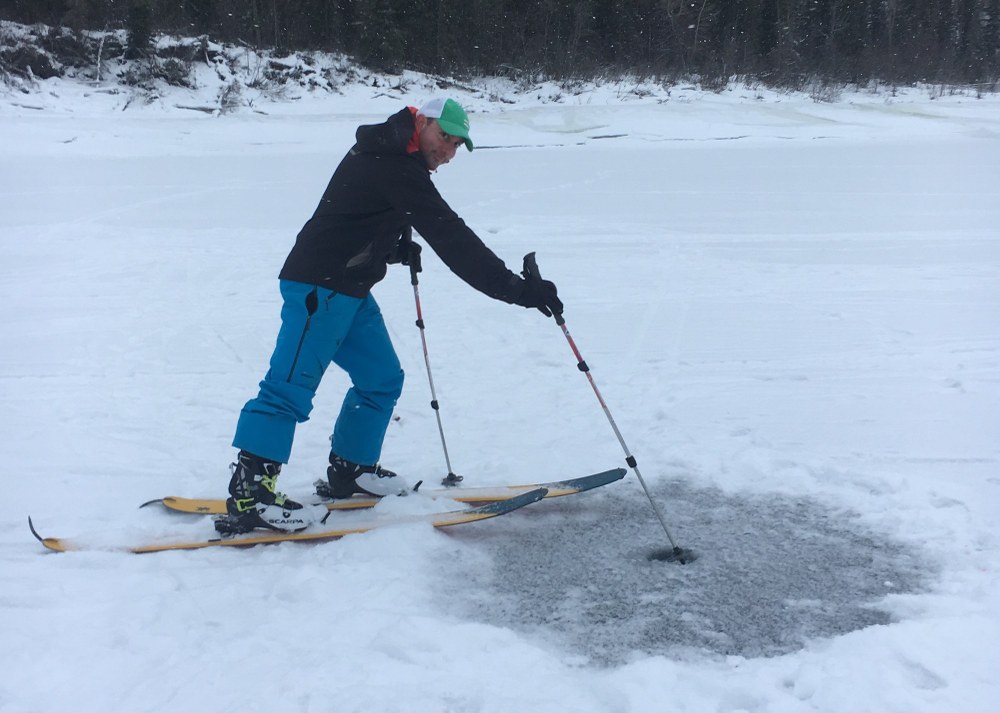
You’ve seen them around: whether with a speed walking grandpa, that youngin’ plowing down the path, or the ultrarunner in the video of the Rocky 100, trekking poles (also called hiking poles or walking sticks) are an outdoor accessory almost as old as hiking itself. But… why would you use them?
The benefits to toting these sticks are more than you might expect. Other than the most well-known usage – increasing stability and balance – poles help redistribute the load from your legs to your arms and upper body[1] reducing the strain on your joints, especially when going downhill. This redistribution helps many people hike further experiencing less fatigue and is of increasing note when using proper technique, usually aiming for a 90° bend at the elbow, adjusting pole length to account for hill slope. Poles are also invaluable during water crossings, can help in first aid, or when creating of shelters - some shelters even being constructed with this in mind[2]. Finally, if these aren’t enough options, a quick search provides a few more examples: from photography (need a mono/tri-pod? How about a DIY selfie-stick?) to scrappy fishing poles, laundry lines, or creative chair options[3], poles have nearly infinite uses. I know I’ve used mine for gentle dog-herding (no dogs were hurt in any herding experiences) and shaking the snow off tree branches. Your imagination is your only limit.
Trekking poles have downsides as well, of course. In addition to having two other items to lug around/take up space when not in use, they occupy your hands (though can be dropped and retained via their straps) and can lead to arm fatigue. Though I personally find them very useful on inclines and declines, I have less use for them on flat ground, opting instead to stash them or leave them at home for slightly increased speed and fewer things to worry about.
Types of Trekking Poles:
So… what is a trekking pole? I’ll go into more of the details of their anatomy below, but, in general, the forms of trekking poles are divided into three main categories: fixed, telescoping, or folding.
- Fixed poles are the simplest design and are about how they sound: fixed. It’s one solid piece of material with a predetermined height, like a ski pole. They’re rigid, often lighter (as they’re missing any of the additional mechanics to allow them to change length or become more packable), and very simple.
- A folding pole usually has three or four pieces of a fixed length which are strung on a rope, so as not to lose the pieces. The pole can be ‘broken down’, so to speak, into the smaller pieces to become more packable. These poles also have a fixed length, as their main focus is the speed at which they can be taken apart and put back together.
- Last is the telescoping pole, the most common trekking pole type. These poles generally have two or three pieces that slide into and out of each other allowing you to determine the height needed. To secure the pole into position a locking mechanism is used (see more below under the anatomy section). The advantage of this type of pole is its packability and the user’s ability to adjust total height, often crucial for proper use. The downside: the locking mechanisms often serve as a point of failure (more on that later) and these poles are heavier than a fixed pole.
- The final, unspoken category of poles is the combination pole; i.e. generally some combination of the telescoping and folding pole to allow for adaptable height and the ability to pack and stow the pole away quickly.
Anatomy of a Trekking Pole:
What are you going to be using your trekking poles for? In this section we’ll dive into some of the details of the different portions of a trekking pole and how it might change what you use or are looking for.
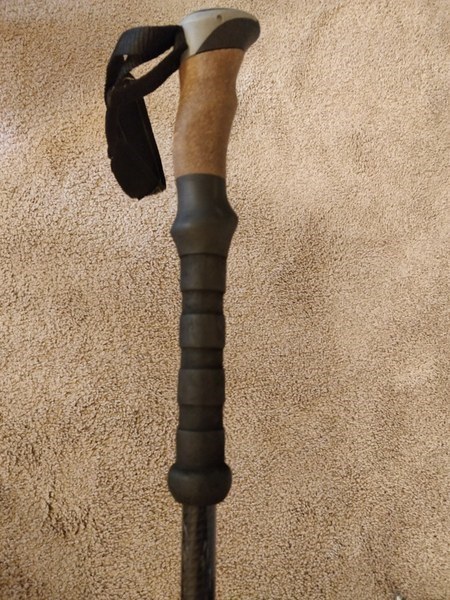
- Grip – from cork to foam, poles comes with a variety of materials to choose from varying slightly in weight, durability, and ‘squishyness’. In the end, the type of material you should select depends on your personal preference. The form of the grip is another aspect to consider. Many (myself included) appreciate an extended grip, which features a grip as you’d expect plus an extension of material below. This secondary, simpler grip allows you to change the position of your hands to maintain proper technique when needing a shorter pole (while traversing a slope, for example), without having to change the pole length.

- Straps – more than just a method to keep your poles close at hand, straps are most useful when used as part of proper technique. They can be used to transfer the load (the downward pressure you use to ‘press off’ from the pole) to your forearms instead of relying on your grip. As the latter (your grip) will tire sooner than later. By moving the force to your forearms you can use little to no additional muscle power. There are several videos you can find online illustrating the technique; I’ve thrown a very simple one into the footnotes, which gives a different reason for it, but still illustrates the technique[4]. Bonus: this can reduce the likelihood of getting blisters on your hands and can help save your thumb if you fall and catch yourself on the ground.

- Sections – traditionally poles vary from one (a fixed pole) to four sections. The number you’ll need is mostly dependent on the flexibility and packability you desire for your particular activity.
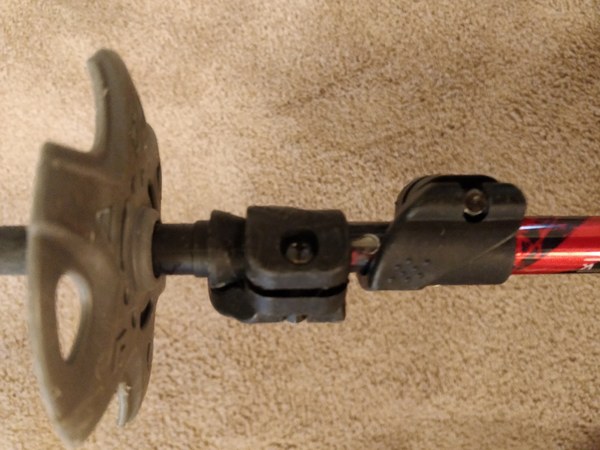
- Locking System – the locking system mostly concerns telescoping or combination poles, as folding poles utilize a nesting joint. For anything with a telescoping nature there are two major locking systems: the clamp/flick lock and the twist lock.
- The clamping lock works similar to fixing a bike tire to the prongs: there’s a piece (either the handle or a screw) which allows you to adjust the tightness of the lock by rotating it. You further tighten, fixing the pole to the desired length by ‘shutting’ the handle or clamping it down. These locks are very dependable and allow for further tightening/adjustment over time by the tightening of the screw on each of the locking mechanisms. This is the only locking mechanism I use.
- The twist lock fixes the pole into place by rotating the desired section of the pole, tightening the locking mechanism (like with some shower curtain rods). This mechanism type can be faster to use and lighter, but you’ll see virtually no one who needs functional and reliable poles using them. They tend to slip, changing the length of your poles as you’re using them and are generally less reliable. I’ve met four pair of these who have failed, one betraying me personally. I would strongly recommend against these (and I promise this is not due to residual bitterness).
-


- Ends/Tips – poles finish in a blunt point of a hard and semi-ductile, metal/composite material that can stand the test of time of thousands of strikes and yet still remain pointy enough to be useful in ice and find the nooks in stone, like carbide. Poles also typically come with a variety of baskets/covers, including: a powder snow basket, a compressed snow/mud basket, a more rounded footy (most useful when using poles in urban/ groomed environments), and a simple point cover for hard, smooth surfaces and protecting the point (imagine the end of a pogo stick; looks a little like that, but smaller). These can be pulled on and off depending on your activity/needs.
 Other Things to Think About:
- Price – a walking stick can be as cost effective as a freebie you grab from the woods, to several hundred dollars of super light, engineered materials.
- Weight – as with any gear, you have a tradeoff between cost and extra weight. Your pole weight comes into play thinking about questions like: how much arm strength do I have and how is my technique? How ultralight am I trying to go? Will this weight get irritating when I need to strap these to my pack? Can the poles be used to replace another piece of gear (like as the poles for a tarp tent)?
- Material – the two most popular materials you’ll find used for poles are carbon fiber and aluminum alloys. Both make very capable poles, but have different strengths/weaknesses. Of the two, carbon fiber is generally both lighter and stronger. However, it’s brittle (it should break outright before it will ever bend) and gets more brittle in cold temperatures (avoid using these as a ski pole). Aluminum is also strong, but a little heavier. It also may be considered slightly more durable.
- Durability – a trekking pole is a simple tool with a durability dependent on the pole type you choose and the activities you do or how careful you are with them. I general, poles should last you a few years. My ski poles have been serving me for 17+ years (with a few newer pairs), while my telescoping poles with clamp locks are aged: 8, 3, and 2 years. Failure points to consider include; materials (those more susceptible to breaking in extreme cold/loading situations) or joints/locking mechanisms (boo hiss to twist locks).
- Packability – how small do you need to go? Poles will never fold up to the size of a matchbook, but with the adjustment possibilities of telescoping and folding poles, they can get significantly smaller than a full-size walking stick. If looking for truly packable poles, note that each additional joint (and therefore increased ability to compress) means a small addition to the overall weight.
- Shock Absorption – what appears to be a hotly debated topic in the trekking pole world, these contraptions are often found at the end of the pole and are supposed to be used to damper the vibrations caused when using the poles. For the average non-stone/road trekking pole user, these don’t seem like they would be worth the added weight/occasional cost. However, for full disclosure, I’ve never used one. Feedback welcome from someone who loves the addition!
- Other Uses – particular poles, like the Whippet[5] which has a pseudo-ice axe fitting off the grip for use in backcountry skiing, have additional uses besides the more typical support when hiking, snowshoeing, running, etc… These poles are rarer and tend to set themselves apart in price and form, usually having specific activities they were created for.
- Gender? – yes, you can find gender-based trekking poles. This sounds almost as good as ‘lady pens’. (To this day I wonder how I ever wrote without them.) If they cost more, please don’t waste your time; otherwise hike your own hike.
Did I miss something? Questions, concerns, or thoughts on trekking poles and how they fit into your life? Please drop me a note in the comment section below!
Resources
[1] For additional reading on the subject see https://www.ncbi.nlm.nih.gov/pubmed/17218900, https://www.backpacker.com/gear/the-science-behind-trekking-poles, or https://www.cooperinstitute.org/2011/02/do-trekking-poles-make-a-difference/.
[2] A few of the options found here include trekking pole shelters; https://www.outdoorgearlab.com/topics/camping-and-hiking/best-ultralight-tent. Other options are readily available online.
[3] Check out a few other examples/descriptions here: https://cnocoutdoors.com/blogs/blog/11-uses-for-trekking-poles-besides-hiking.
[4] A quick video provided by ‘Inspiration Outdoors’ showing the basic hand position and movement for the poles: https://www.youtube.com/watch?v=yECNecSD1Yg. A longer video that walks through much more of both fitting the pole to you, how to hold, and how to use: https://www.youtube.com/watch?v=7q2YwOE4okA.
[5] More information on the Whippet is found on Black Diamond, the manufacturer’s, website: https://www.blackdiamondequipment.com/en/ski-poles/whippet-ski-pole-BD1115650000ALL1.html.
Add a comment
Log in to add comments.I started out using trekking poles before my knee replacements and my balance was really poor. Now, I continue to use them even for long walks, because they help me keep my posture correct and prevent low back aches. They also redistribute weight, so when I'm going up or down steep elevation, my arms get quite the workout. They are fantastic for times when you have to maneuver large rocks/boulders, streams, etc. Mine live in my trunk so I always have access to them when I'm out.
 Sam Sanders