Excerpted from Photography Night Sky: A Field Guide for Shooting After Dark, by Jennifer Wu and James Martin.
Chapter 3, Preparing to Shoot
NIGHT SKY PHOTOGRAPHY necessarily involves long hours outdoors in the dark. Being prepared will not only help you get shots you love but also help you save time and keep frustrations to a minimum. This chapter has two main branches: mental planning and logistical preparations. Planning out your shots in your mind and researching ahead of time what will be in the sky when you go out allow you to capture the celestial events that most intrigue you, and perhaps a few unexpected images as well. Preparing for the logistics of your shoot will ensure you have the equipment you need and help you stay out long enough to capture the images.
PRELIMINARY RESEARCH
Before the shoot, you’ll want to find out where the moon and Milky Way will be in the sky. Apps like Star Walk and Heavens Above, the website www.astronomy.org, and Stellarium, a free desktop planetarium, will show you where in the sky you can see the Milky Way or the moon. See the Resources section at the end of the book for more good sources of information. If your aim is to capture less predictable night sky events—meteors, iridium Aares, and auroras—you’ll find that planning and research can still pay off. The National Oceanic and Atmospheric Administration (NOAA) and other agencies publish much of their space weather forecasting data on their websites. Space weather refers to the conditions in space, especially conditions near the earth. While meteors and auroras cannot be pinpointed with absolute certainty, you can increase your chances of capturing these ephemeral night sky events if you research forecasts before you head out into the field.
Finally, one last tip: scout in the daylight and decide what you will photograph—stars as points of light, star trails, the moon, or another celestial phenomenon.
PHOTOGRAPHING THE MILKY WAY GALAXY
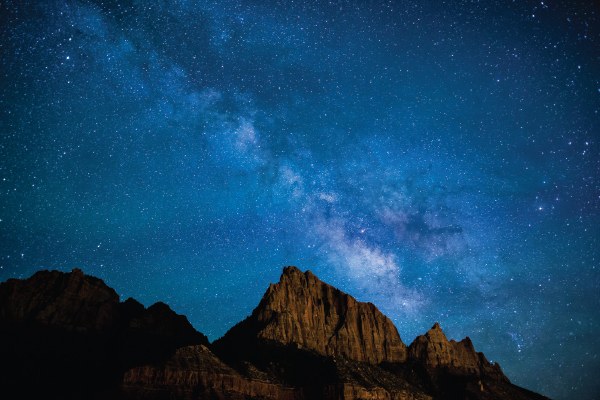
As our planet orbits the sun, the brightness of the sun blocks our view of most of the galaxy. The galactic center of the Milky Way, where the stars are most densely clustered, is near Sagittarius, which looks vaguely like a teapot. If we wish to photograph Sagittarius in July, it will be midway through its transit across the night sky at midnight. In January, it will be directly behind the sun, and daylight will overpower it until April, when our orbit returns the wider part of it to the night.
When we look at the stars in January, we look toward the outer edges of the galaxy. Sagittarius is the southernmost constellation. From North America, it seems to glide just above the horizon from east to west, but in the Southern Hemisphere it wheels directly above. As a consequence, each night the constellation is visible longer in the Southern Hemisphere than in the Northern. However, for a photographer, lower may be better, allowing us to place the luminous center of the Milky Way above an interesting foreground.
The best months to see the bright center of the Milky Way are June, July, and August. But keep in mind that Sagittarius appears at different times of day: It first appears just before dawn in the south to southeast in early April, but is quickly obliterated by the rising sun. In May, you’ll have to get up hours before dawn to catch the show, but by July, the constellation will be as high in the sky as it will ever get. Conditions are ideal in August when it’s still well above the horizon and visible earlier in the evening. By mid-September, we see less of the constellation and for less time until it sets for good in early October, sliding below the horizon before sunset.
The Milky Way appears in the sky in different positions depending on the time of the night and the month. Late evening in April and May, or early evening in June, are good times to photograph the Milky Way as a band across the sky. Look for a strong diagonal line in July and August. A more vertical band can be seen during sometimes of night while the Milky Way is in transit in July and August.
In the Northern Hemisphere, in the summer months around July, you may notice the Milky Way move across the sky clockwise from the south to southwest. In the Southern Hemisphere, the Milky Way moves counterclockwise from the south to southwest.
In the contiguous United States, wait about an hour and a half to two hours after sunset to get the really dark skies. You will need to wait longer the closer you are to the North Pole since twilight lasts longer in places such as Alaska and Scandinavian countries.
FINDING YOUR LOCATION AND CLEAR SKIES
Several factors contribute to seeing plenty of stars. A dark, cloudless night with low light pollution is not enough. You will see more stars when the air is clean—without smog and with little wind to stir up dust. Ocean shorelines often enjoy low air pollution. Mountain and desert air is excellent for shooting stars because the low humidity allows for the stars to shine through. When researching your locations, consider deserts, oceans, high mountain peaks, and areas of low air and light pollution.
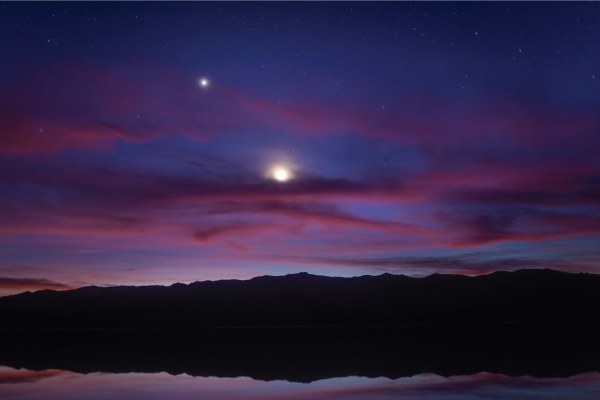
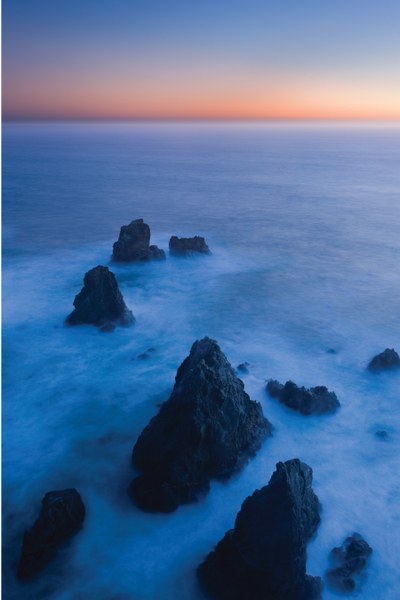
Overcast days and clouds can block the stars, so choosing a clear night is important. On the other hand, clouds can add interest to the sky when we can still see stars as well. When there is a thin layer of haze in the sky, it looks dull and the stars are blurry. The haze acts as a soft-focus filter. You will see a white halo around the stars even though the stars are in focus, which creates an unusual effect: the stars look bigger. Some people enjoy this, though sharp stars are preferred for prints. To photograph clouds moving at twilight, try a 2-minute exposure, or longer, to get the motion of the clouds at dusk for a wispy effect.
Check the weather for wind and rain. For clouds, go to 7timer (7timer .y234.cn); click on “weather” and “total cloud cover.” Clear Sky Chart (cleardarksky.com/csk/) is an astronomer’s forecast that shows the next 48 hours of cloud cover for North America.
FIELD CONDITIONS
Night sky photography entails working in darkness and often in cold conditions. You’ll avoid grief by setting up your gear before the sun goes down. Likewise, running down a checklist will save you from suffering through a dead battery midway through a star-trail sequence, discovering you left your ISO at 25,600, or lamenting the hat left behind on an icy evening.
Checklist: Before You Shoot
There’s nothing more frustrating than fumbling in the dark to change camera settings or replace a dead battery. Arrive prepared.
What to bring:
- Camera, lenses, lens hood
- Plenty of formatted memory cards
- Sturdy tripod and ball head
- Battery grip and plate to attach to ball head or L-brackets for battery grips (optional for star trails)
- Extra batteries
- Cable or shutter release (or use self-timer)
- Intervalometer
- Headlamp with red light
- Flashlight and gels for light-painting; diffusion material
- Extra flashlight bulbs
- 4x power loupe
- Sensor cleaning tools
- Chamois and cloth to wipe frost and condensation off the lens
- Warm clothing: heavy down coat, wool or fleece sweater, long underwear for both top and bottom, hat, and warm boots
- Photographer’s mitts or gloves and liner gloves
- Rubber bands or velcro to attach hand warmers
- Hand and toe warmers for hands, toes, camera, lenses, and pockets
- Bug spray, if needed
- Food and water
- Windshield sun block or cardboard for the outside of the windshield to prevent frost
- Compass
What to prep:
- Charge batteries, in the camera and backups
- Place black tape on the red or green processing light on your camera
- Clean the sensor
- Clean the lenses
- Remove filters
- Put on lens hood to prevent flare and frost buildup
* * * *
IMAGES: (from top) Milky Way shot at f/1.4; A twilight shot of sea stacks allows for a long exposure and a misty looking ocean, Bodega Bay, California. f/10, 15 seconds, ISO 100, 24–70mm at 28mm, Canon EOS-1Ds Mark III; Clouds are colorful even well after sunset. Death Valley National Park, California. f/1.8, 8 seconds, ISO 640, 24mm II lens, Canon EOS 5D Mark II. All photos by Jennifer Wu.
 Mountaineers Books
