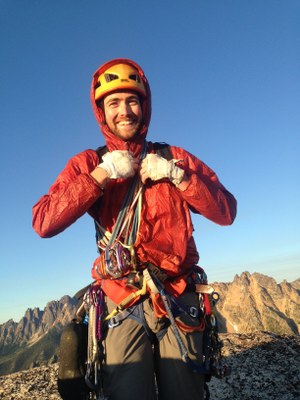
 Tess Wendel

It all started over beers with my friend Joe. After a bouldering session at the UW rock, we were chatting about plans for the upcoming weekend.
The Plan
"Weather forecast looks great," I said.
"Yeah it does," he said. "I'm thinking Washington Pass." Before I could suggest a couple of easy-going, moderate routes at the pass, he blurted, "I'm thinking Liberty Crack."
I paused. I didn't know if he was serious or just pulling my leg.
"Or we could do Northwest Corner, but Liberty Crack has been on my list forever and the conditions are going to be perfect."
Okay. The man was serious.
"Remind me - what is it rated?" I asked, trying to buy myself time to gather my thoughts. I knew the answer, having read Blake Herrington's recent trip report of the free ascent earlier in the month. I knew it was 5.13something if done 'free'. I pulled out my phone and did a quick scan of Steph Abegg's beta on the route which said 5.9 C2.
C2... crap I can't remember the aid climbing ratings...
"Full disclosure I've never done any aid climbing." I said.
"Can you ascend a rope?"
"Sure, I can ascend a rope," I answered, thinking about the couple times I've practiced prussiking at The Mountaineers Seattle Program Center or used a microtraxion to check gear placements on a fixed rope. But I've never ascended a rope with jumars outside - on a big wall - which is what we would have to do to climb Liberty Crack.
"Great, you'll be fine," he responded with confidence.
Knowing full well my practical knowledge around aiding was virtually non-existent, I responded with qualifiers: "Alright I'm in, but only if we can get together Thursday to review our system and gear and get practice jugging."
"Deal." It was done.
An Alpine Start
We hit the road after work on Friday in hopes of getting a few hours of sleep off Highway 20 before starting the climb Saturday.
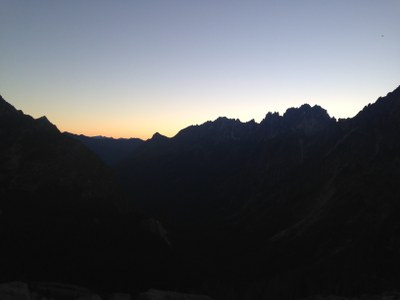
Four o'clock in the morning came too quickly. We broke down our bivy, drove to the pullout, and completed the last gear check before hitting the trail just before 5am. It took us around 45 minutes on the steep trail to reach the talus below the face.
LOOKING TOWARDS SILVER STAR IN THE EARLY MORNING LIGHT
We encountered the first crux - a short bit of steep, icy snow covering the talus to get to the base of pitch. Luckily, we were expecting this. We'd grabbed sticks earlier in the hike to assist with footing on the slope, but the reality was worse than imagined. Unfazed, Joe grabbed a rock and started chipping steps in the icy snow towards the lip of the moat.
Once at the lip, we discovered a deep moat, and a slip here would have resulted in a nasty fall. I downclimbed back to my safe talus spot and waited for Joe to navigate about 30 or so feet further to where the moat mellowed. I chipped more steps towards a handline he threw down, joined him in the moat, and then we climbed up to Pitch 0. Getting there involved a couple of neat chimney moves - pressing up against the snowy side of the moat and stemming against the rock on the other side.
In other words we had a distinctly alpine start to the climb.
Joe carefully manuevering further left along the moat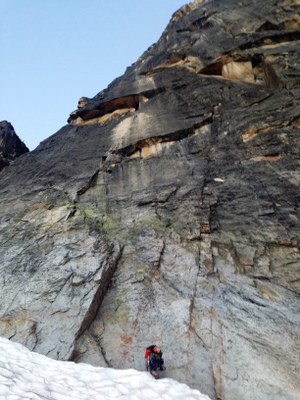
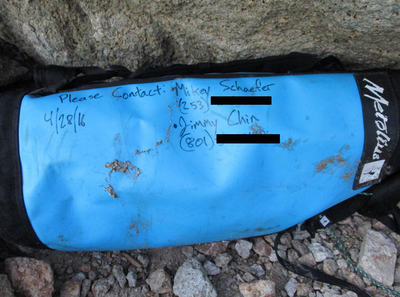
Guess whose haul bag we saw sitting at talus on the base of the slope?!! #celebritygear #climbinginthebigleagues
Climb on
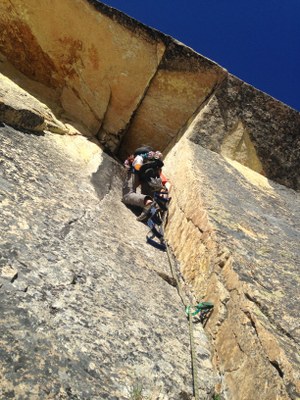
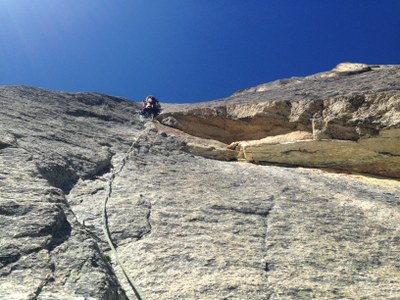
To start the climb (assuming you aren't going to free climb a 5.13) you have three aid pitches right off the deck. With Joe on lead and me following, they probably took us about 4.5 hours. We definitely encountered flaring cracks making for difficult placements, but Joe made it look easy and I did my best to follow and clean as fast as I could.
I knew going in that the Lithuanian Lip, a small roof on pitch 2, was going to be tricky to clean. As suspected, it was a bit of a struggle-fest. The bolt right below the roof was particularly tricky. It required a few pull ups to clip in to other gear in order to weight and unweight the rope - all while dangling in midair. Getting the ascenders over the lip wasn't exactly a walk in the park either. I have to give kudos to my co-worker Jeff Bowman for giving me some tips before heading out and Joe solid coaching and encouragement on route.
The Lithuanian Lip!
Joe on pitch 3.
With the aid pitches under our belt, we were excited to start moving a little faster. The next 7 or 8 pitches are mostly 5.8 and 5.9 with a couple 5.10 moves sprinkled in, and then some 5.fun climbing at the top (the minimal part I led) before the route meets up with the Beckey Route for the final scramble to the summit.
We definitely moved faster, but climbing technical terrain with a backpack on is no joke. I recommend hitting up the hand and finger cracks at Vertical World with a pack on before doing something like this. We definitely employed the 'French free' method in a few places to keep moving quickly and steadily upward.
I was surprised at how exposed the climb stays the whole time. I guess that's the nature of a big wall, but I'd secretly been hoping for a large ledge for a quick "party separation/ bathroom break" moment... but no such luck. Just belays with small stances and tiny ledges.
As soon as we connected with the Beckey route the wind kicked up. We threw on layers before scrambling to the summit. We topped out at 8pm, took a few photos with the wind whipping, and scrambled right back down.
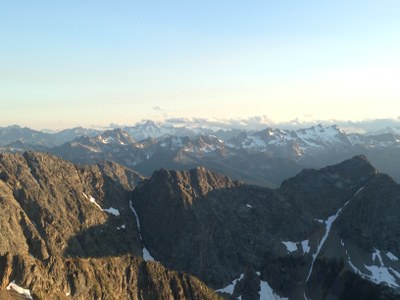
LOOKING SOUTHWEST FROM THE SUMMIT TOWARDS BONANZA AND DOME
Down we go
Joe spotted me while giving pointers for downclimbing the short 5.7 slab on the summit block - I think next time I'd feel comfortable on my own. We ran into another team finishing the Beckey route, who decided not to top out due to the late hour. Joe directed me, and the other team who needed help finding the anchors, around the corner to the rap station (did I mention that this was my first time up Liberty Bell?) and we threw together a double rope rappel with our new friends.
Surprisingly, one of the members of the other team was on her first outdoor multi-pitch and had never rappelled outside before. As a result, joining of the ropes didn't save us much time but it was nice to meet fellow Seattle climbers.
We threw on approach shoes and headed down the gully as the sun began to set. Beta: stay skier's-left for the first part of the gully descent, then after 150 yards cut skier's-right for the remaining section - it makes the gully pretty easy and puts you on solid rock.
Headlamps were required by the time our climbers trail met up with the blue lake trail. We took a quick shortcut to the highway before the last switchback on the blue lake trail and then stumbled back along the highway. We hiked the last mile on the highway under the milky way with tired smiles and grumbling stomachs.
Gear & Beta
Gear: 70 m rope, doubles from tips to #2, a single #3 and #4 (we definitely placed the #4 many times so definitely worth it to bring it), a set of BD nuts plus some DMM peanuts, one set of aiders for Joe, a set of ascenders- one with a single runner and the other with a double runner sized for the follower jugging, a summit pack for both climbers each with 3 Liters of water, food, approach shoes, some extra layers and mini first aid.
Additional notes: Going lighter and doing this in a day was definitely the way to go. The route is graded 5.9 C2 but to lead this route you definitely want to be comfortable leading 5.10 trad since you are climbing with a pack and its a lot of pitches. It is a bit hard to hear your climbing partner on the terrain between pitches 6 and 8, radios could have been useful. Blake Herrington, Super Topo and Clints topo on Steph's site break up the last 5 pitches in different ways and it looks like there isn't one great way to pitch it out. Rope drag was definitely a problem on pitch 6 so maybe pitch it out shorter or just make sure to extend more gear which can be tricky if you need to aid the 5.10 section above the block.
Final Thoughts
After posting a picture online I was asked on Facebook if the climb was a comfortable challenge. I feel lucky to say "yes it was a comfortable challenge... but only because I had an all-star partner who was strong and had previous big wall experience." Thanks again to Joe and a shout out to Katherine who let me borrow the perfect size Patagonia 25 L pack. It was a team effort all around.