The following is excerpted from Gym Climbing: Improve Technique, Movement, and Performance, 2nd Ed., by Matt Burbach. The excerpt is a small piece taken from the "Lead Climbing" chapter and was further edited down for space. As November begins, climbing gyms will fill up with both beginning and experienced climbers looking for indoor challenges. This excerpt is for those who have learned to top-rope and feel ready to start gaining lead-climbing skills.
INTRO TO LEAD CLIMBING IN THE GYM
By Matt Burbach, photography by Jon Glassberg
Although top-rope climbing has many advantages—it is the easiest introduction to roped climbing, skill requirements are basic, falls are generally short and gentle, and you do not have to worry about dealing with your safety system as you climb—it also has limitations. For example, top-roping extreme overhanging or wandering routes can be unsafe, since falling can result in big swings that can endanger you or others in your path. Another limiting factor is that many climbing gyms dedicate only a portion of their total wall surface to top-rope climbing. Knowing the skills necessary only for top-roping limits your route choices if you should choose to start climbing outdoors, as the sole routes available to you will be those that can be accessed from above to set anchors.
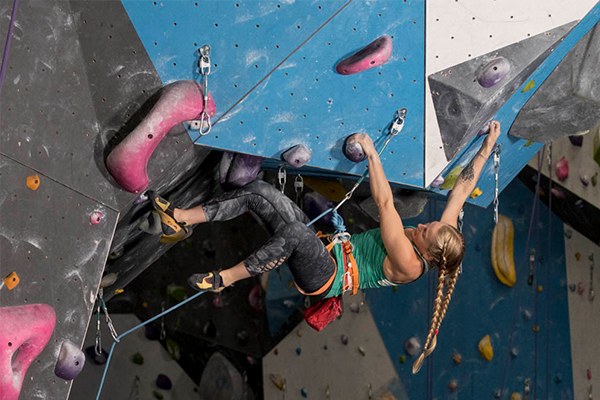
Overcome these constraints by broadening your skill set to include lead climbing. Rather than climb on a rope already anchored at the top of the climb, lead climbers take the rope up as they climb and affix it to progressively higher anchor points along the way. In a gym environment, these anchor points generally consist of a quickdraw (two carabiners connected by a piece of nylon webbing, also known as a draw) attached to a fixed bolt. Outdoor leaders protect their climbs by placing protective gear in the rock or by clipping draws to fixed bolts.
Lead climbing allows for a freedom that top-rope climbing cannot provide. Once you are a proficient leader, your choice of gym routes will be limited only by your skill. You will be able to explore new terrain, such as meandering routes or those that go through large overhangs. Because lead climbing involves setting anchor points in addition to moving up the wall, it is more mentally engaging than top-rope climbing.
Lead climbing has its own constraints and considerations, however. For example, instead of worrying about big top-rope swings, you must be prepared for longer falls than in top-roping—a leader who falls from a point above the last clipped bolt travels the distance to that bolt and then that distance again. These longer falls end with a sudden jerk as the rope pulls taut.
Leading also requires greater endurance, poise, and efficiency than top-roping the same grade, since you must stop several times during a lead route to pull up slack with one hand and clip the rope into the quickdraw.
RESPONSIBILITIES OF A LEAD CLIMBER
Because the commitment level of lead climbing is greater than top-roping, it is not something beginners should jump right into. Those attempting to learn how to lead climb should feel confident climbing a grade of at least 5.10 on a top rope. While this is not a magic grade, gyms seldom set lead routes easier than 5.9. And even more important than the ability to ascend a certain grade is a solid foundation in movement and kinesthetic awareness. If your climbing is not yet smooth and graceful, consider putting in more time on your technique before embarking on lead climbing. Remember, as a lead climber, you contend with not only the actual act of climbing but also managing and clipping the rope to ensure your safety.
BEFORE THE FIRST CLIP
Once safety and commands have been established, the 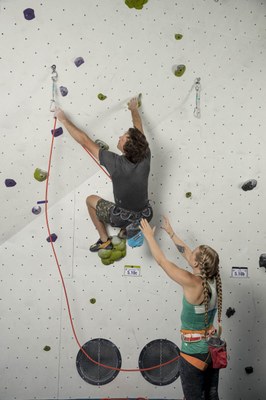 climber can start up the wall. Keep in mind, though, that a fall before making the first clip will result in hitting the ground. There are a couple of precautions you and your belayer may want to take to prepare.
If the opening moves of the climb are difficult, preclipping the first bolt is not a bad idea—staying safe should be your first priority. If possible, climb up an easier neighboring route, properly clip the rope into the first quickdraw, and climb back down to the ground. Make sure to confirm the role of the belayer before you attempt this maneuver because you may choose to down-climb or be lowered from the first bolt.
Another option for protecting a fall prior to the first bolt is to have the belayer spot the climber during the opening moves of the route. With this approach, your belayer will first pay out enough slack for you to clip the first draw and then assume a spotting position as in bouldering (see Chapter 4, Bouldering). As soon as you have clipped the first bolt, the belayer takes in the appropriate amount of slack, and you will be on belay.
CLIPPING THE ROPE CORRECTLY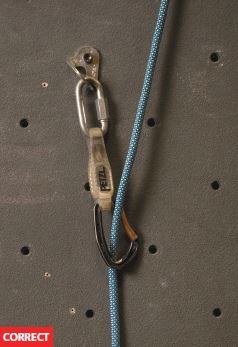
The correct way to clip a rope into a carabiner is with the climbing end running up along the wall and then out through the carabiner to the climber. An incorrectly clipped rope, also known as a back-clipped rope, passes through the carabiner from the climbing side and then into the wall. Because a back-clipped rope can become unclipped in the event of a fall, great care should be taken to ensure that you clip the rope correctly every single time.
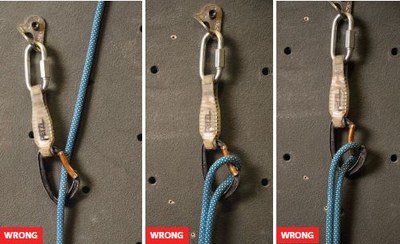
The mechanics of clipping the rope into a quickdraw are as simple as they seem; however, applying those mechanics with pumped-out forearms and shaking legs can make things much more complicated. The use of a practiced, fluid, efficient technique is an absolute necessity.
The following section introduces methods for efficient clipping. Although these are not the only ways you might get the rope into the carabiner, they are among the most commonly used. If these styles do not work well for you, experiment with other approaches. Ultimately, the best way is the fastest and most comfortable option for you. When encountering a quickdraw, the gate will either face toward or away from you, and this determines how you grab and handle the rope before clipping.
Middle-finger grab technique. Use this method when clipping a carabiner whose gate faces the opposite direction as the hand you are clipping with, such as when the gate faces right and you are clipping with your left hand. Stabilizing the quickdraw with the middle finger makes clipping easy. If the carabiner is positioned against the wall on less-than-vertical or vertical terrain, the middle finger can pull the draw away from the wall for trouble-free clipping.
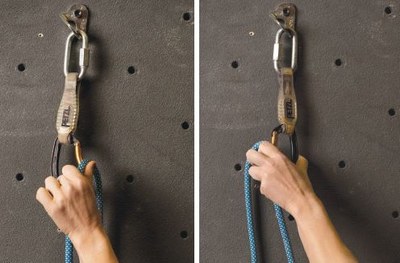
Pinch technique. Use this technique when the carabiner gate is on the same side of the quickdraw as your clipping hand, such as when the gate is facing to the left and you are clipping with your left hand. Most people find this way of clipping more challenging than stabilizing the draw with the middle finger. Practicing both techniques on a carabiner hanging close to the ground will help you to improve rapidly.
* * * *
Excerpted from Gym Climbing: Improve Technique, Movement, and Performance, 2nd Ed., by Matt Burbach
 Mountaineers Books
