Trip Report
Intermediate Alpine Climb - South Early Winter Spire/West Face & Southwest Rib
Two 5.8 crack pitches at the beginning warmed us up for a few more cracks, a couple run out slab sections, a 5.7 pair of off-widths, and never-ending exposure and views across the North Cascades.
- Sat, Jun 1, 2019
- Intermediate Alpine Climb - South Early Winter Spire/West Face & Southwest Rib
- South Early Winter Spire/West Face & Southwest Rib
- Climbing
- Successful
-

- Road suitable for all vehicles
-
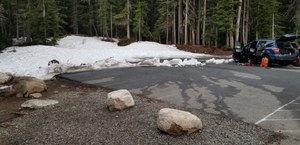 Parking lot mostly cleared of snow. There was only a little bit left in the southern end. Snow on trail almost right away, but nighttime temps in the upper 40's meant that we didn't need crampons or microspikes. We had steady snow going up the basin below the Liberty Bell Group, but again didn't need traction. We just followed steps kicked in. We wore a combination of approach shoes (with gaiters) or boots. The ledge from the Y-shaped Larch tree into the first pitch was clear of snow, and the route was clear of snow except for a very small patch remaining in the gully near the summit.
 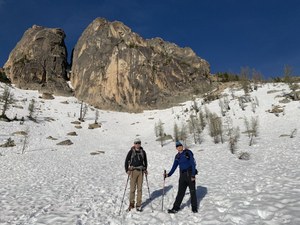 On the descent, there was a patch of snow on one of the western ledges, but easy to work around. Snow had softened by evening, for almost perfect plunge stepping back to the trail. Just had to be careful for a few gaps and holes. Great weather, ranged from 40's to 60's. And I think the area was pretty empty of other climbers because it's the weekend after Memorial Day, and maybe everyone else got out the weekend before. Otherwise, I cannot explain why we had the route to ourselves all day.
I took three teams on the weekend after Memorial Day. There were no other people on the route all day, despite the beautiful weekend. Other routes in the Liberty Bell Group also seemed rather empty. Three of us had camped at Lone Fir the night before, and even the campground was rather empty. Three other people had a cabin in Winthrop for the weekend.
I used three main sources of information to plan from. The topo diagram from WA Pass Climbing was great. The pitches are very similar to Mountain Project's description, with a couple differences mentioned below.
- MountainProject lists 7 pitches.
- WA Pass Climbing by Ian Nicholson lists 10 pitches.
- A blog on RocknRopeNW (Rob Busack's report, I believe)
Base of Climb -- Definitely start at a Y-shaped larch tree to get a great 5.8+ pitch before the "Wavy Crack". Then do the wavy crack in pitch-2. Amazing! Some descriptions mention scrambling into the couloir and traversing/ rappelling to the base of the wavy crack. 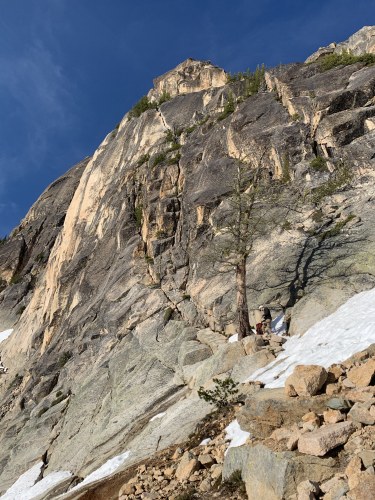 If you do that, you miss this excellent pitch from the base of the rib. The Wavy crack is very obvious, higher on the wall. Once we were below that, the large Y-shape larch and the little ledge into the first pitch was also obvious. Rob's blog clarified that the first pitch is straight up from a scraggly tree on the ledge, not around to the left. Pretty obvious. The photo shows Fritz at the larch, the ledge that heads left and up from the tree, a section of blocky stuff up to a tree ledge, and the left sloping wavy crack between two treed ledges (all the lichen cleared off it). The 5.8 pitch goes up the crack to the right of the blocky stuff, toward the bottom of Wavy Crack.
P1: Mountain Project and Nicholson are the same, starting from the Y-shaped larch tree. The "awkward bulge" is an overhanging ledge thing with a hand crack and a wall on the right side. There are foot placements under the bulge, but not much on the right wall until you get yourself a little higher. I put a right hand in the crack to begin moving up, put the feet down and under the bulge, reached with my left hand to place a #2 cam to protect the next move, and then got both hands in the crack and leveraged over the bulge while finding at least one spot for a foot on the wall. Exciting! I'd say that's the crux of the entire route. Our first team bypassed that bulge by going up a dihedral to the right, just before the bulge. It didn't look any easier, but I think they missed the best section on the route. I agree with the ratings in both guides for that pitch, 5.8+.![FB_IMG_1559766701999[1].jpg FB_IMG_1559766701999[1].jpg](https://www.mountaineers.org/activities/routes-places/liberty-bell-blue-lake-trail-area-review/south-early-winter-spire-west-face-southwest-rib/images/fb_img_1559766701999-1.jpg/@@images/0c45294f-3976-4a5b-9107-cd82191fec8e.jpeg)
P2: Nicholson and MountainProject are similar and I agree it's a 5.8. At the top of Pitch-1, we had reached trees about 10 meters below the beginning of the wavy crack. We climbed that 10 meters, and then the wavy crack, ending at a ledge and another set of trees just above the crack. Definitely sling your gear on the left side of your harness/body in order to climb this pitch. Your right side will be up against the wall. The photo shows Lena in this crack and how the crack looks up on the wall as you approach the base of the climb.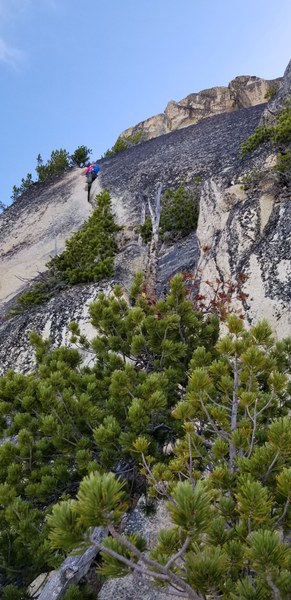
![FB_IMG_1559766753285[1].jpg FB_IMG_1559766753285[1].jpg](https://www.mountaineers.org/activities/routes-places/liberty-bell-blue-lake-trail-area-review/south-early-winter-spire-west-face-southwest-rib/images/fb_img_1559766753285-1.jpg/@@images/2e67edcc-c541-496b-8e7e-703ea0f366ec.jpeg)
P3 and P4: Mountain Project combines this as P3. The first team did separate pitches and then yelled down for us to just combine them. The key to combine them is to avoid slinging the tree at the top of the splitter crack. ![FB_IMG_1559766760966[1].jpg FB_IMG_1559766760966[1].jpg](https://www.mountaineers.org/activities/routes-places/liberty-bell-blue-lake-trail-area-review/south-early-winter-spire-west-face-southwest-rib/images/fb_img_1559766760966-1.jpg/@@images/0433c814-7f13-4a76-ab55-e1a41e1650c0.jpeg) At that tree, turn to the right and go up a ramp, to the corner. Set up a gear anchor, but save your small cams for "Nervous Nelly". The photos show how it goes leftward and rightward, and Emma at the start of the splitter crack (P3).
At that tree, turn to the right and go up a ramp, to the corner. Set up a gear anchor, but save your small cams for "Nervous Nelly". The photos show how it goes leftward and rightward, and Emma at the start of the splitter crack (P3).
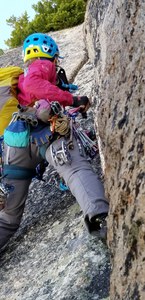
P5: Nervous Nelly Pitch (Mountain Project's P4) -- I think I got five small cams into this long pitch (~50 meters). It wasn't too hard of a slab except the "tricky step-down before going for the jug". Even the tallest among us seemed to need one step downward onto a steeper slab before reaching the said "jug". Shorter folks needed two more balancy slabby steps downward and right before reaching the jug. I won't say any more than that. I think the "Aretes" after the bear hug are more runout than this pitch, but "nervous" was the right word for it. The photo shows the "Nervous Nelly" from the bottom, and part of our team at the base of the "Bear Hug" above it. The blue rope shows how it leads up and right before heading on up to the base of the Bear Hug.![FB_IMG_1559767885089[1].jpg FB_IMG_1559767885089[1].jpg](https://www.mountaineers.org/activities/routes-places/liberty-bell-blue-lake-trail-area-review/south-early-winter-spire-west-face-southwest-rib/images/fb_img_1559767885089-1.jpg/@@images/c1227d62-bc07-41b3-8b9d-664d607abaaa.jpeg)
Side Note: About this time we could see our fellow Mountaineers descending the South Arete, John, Alina Andrew, and Julia. "Hey there!"
![FB_IMG_1559768151769[1].jpg FB_IMG_1559768151769[1].jpg](https://www.mountaineers.org/activities/routes-places/liberty-bell-blue-lake-trail-area-review/south-early-winter-spire-west-face-southwest-rib/images/fb_img_1559768151769-1.jpg/@@images/d7eef8da-c358-4e2f-8a56-72df5adc46d0.jpeg)
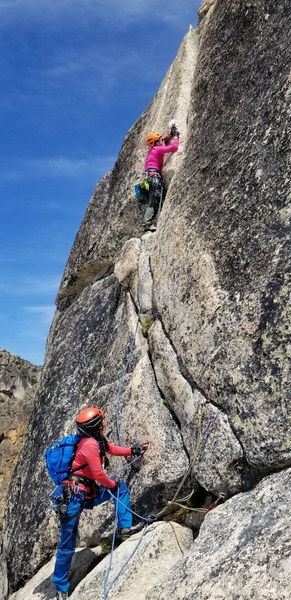 P6: Bear Hug (P5 in MountainProject) -- There is plenty of beta and photos online about this pair of off-width cracks. Like everyone else, I used one #4 at the bottom, and then scooted a #5 cam up the crack as I similarly scooted upward. I put both cams in the left hand crack, although the ride side probably takes them too. The first difficulty was to just get in the cracks. I think we all high stepped with the right leg to get up in it. Then, I'd reach a good stance for both feet and just tell my belayer to "give me a little slack... I'm moving the cam up". Then I'd have her "take" so I was tight to the cam and move up into another good stance. Once near the top, there are good holds to finish it off. I put a piece above the top to protect the follower before heading right onto a great belay ledge with a gear anchor. (Photo shows Annie and Lena placing their #5).
P7: The Aretes (P6 in MountainProject) -- This starts with blocky low 5th as shown in the Nicholson topo, and then you move left to another corner of the arete. There, you'll see a small bolt on the left side of the arete, mentioned in Mountain Project. On the way there, don't put in many pieces to help reduce rope drag later on the runout slab... That bolt is crap. I think it's a 3/16" bolt, not even 1/4". A small chink in the rock to the left will take a piece of pro. I moved above the bolt to a horizontal crack that breaks over the edge of the arete.
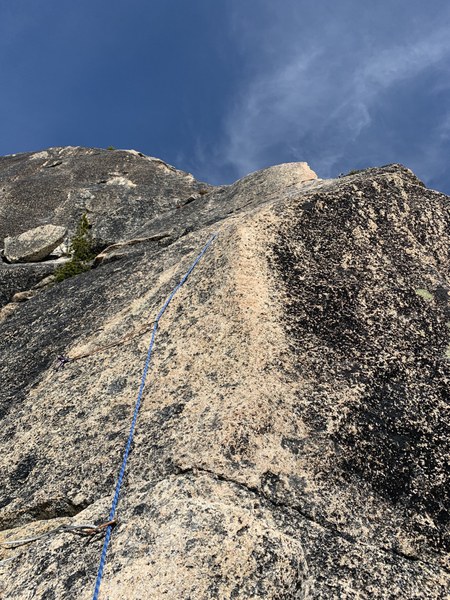
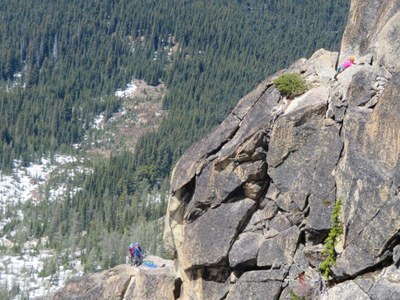
It's obvious some people go straight up the corner of the steeper and unprotectable arete that the rope in the photo heads toward. The RocknRope blog mentioned going left and up, maybe where the little tree sits, but that didn't look good. The first team had gone to the right of the upper arete (where the horizontal crack breaks around the edge), onto a very exposed ledge above the SW Couloir (Photo below, ooh baby!).
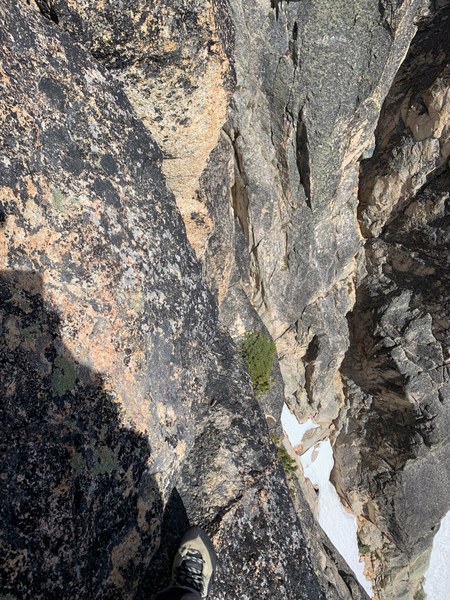
That narrow ledge had a spot for a cam below your feet, and then led to an upward line with some tree trunks and branches that led up to the top of the arete. Then I had to move left a little bit and up a little more to a belay ledge. Rope Drag! My route started to the right then left to the arete and the bolt placement, then up the left side of the arete, then to the right around the upper arete across the exposed ledge, then left and up to the anchor… some drag yeah. Mountain Project carries P6 way up toward the Rabbit Ears, but this was a good place to belay from.
P8: This is a full 60 meter pitch up toward the Rabbit Ears and into the Gully (Parts of P6 and P7 in MountainProject) -- Two options. Go up to the rabbit ears and rappel into the gully, or find the rightward traverse into the gully below the rabbit ears. 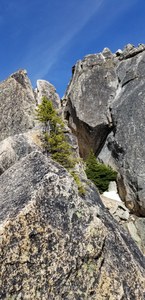 I guess the rappel from the ears is best when the gully or the traverse into the gully are full of snow. We opted to traverse into the gully with one 5.2 move according to Nicholson. Not bad at all, so long as you protect that move.
I could not see the rabbit ears from the belay until I led up over a hump. They are on the left skyline in the photo. The photo also shows the tree on the arete below the rabbit ears. That tree serves as the waypoint into the gully. I went to the tree, around the right side of that tree, and saw a ledge system going downward to the gully. The left facing skyline at about upper-center photo is the location of the final pitch to the summit. The trees in the gully and some snow are also visible.
A full 60m just barely took us to the tree belay in the gully. Two teams belayed at a tree and then coiled rope in hand for 10 meters to the notch above the gully. The third team radiod his belayer to, "go onto simul-climbing mode" and then continued leading up the gully to the notch, making an anchor at the base of the last pitch. (protect the follower's traverse into the gully). At the notch, we each belayed the final pitch of technical climbing. The photo below shows Fritz (white helmet, dark clothing) making the traverse into the gully, above the "5.2 down-climb".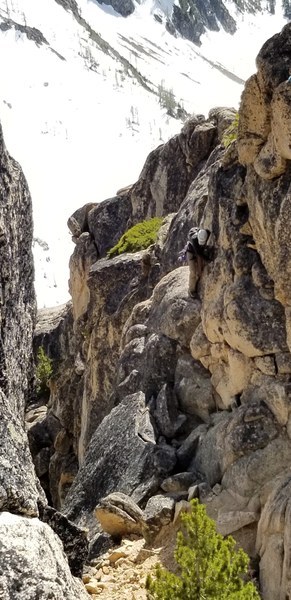
P9: The final pitch is very short (It's part of P7 in MountainProject) -- At the notch above the gully, you'll see two cracks, a rightward leaning crack (incorrect), and a more direct upward crack on the left (correct crack). It's an easy lead to the summit block after all the pitches that came before. Every team set a gear anchor and belayed up their follower. The photo shows the correct crack on the left that Emma just climbed, and the rightward crack to the right (much wider)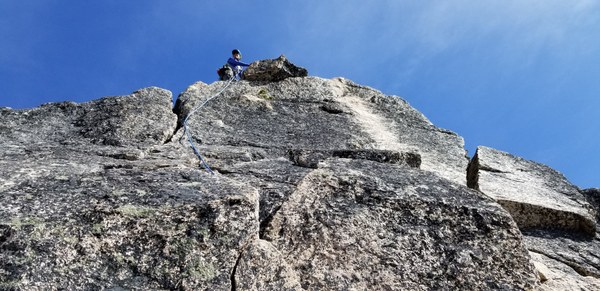
We had something to eat on top, but it was getting late. We saw another Mountaineer, Michael Telstad, arriving from the Hitchhiker route. We scrambled over to the South Arete for our descent and met two high-country hoboes doing free solo up and down the S. Arete. They had been doing ski laps across the bowl all day, under a cornice. I'm not sure I'd do either, skiing under the cornice or free-soloing the S. Arete, but they seemed very comfortable and were definitely faster than we were.
 We set a fixed line on the Whale/Camel-back even though we felt like experienced pros by this time. Keep safe! We scrambled to the rappel slings on a tree about 30m above the chimney for a first rappel. Then we did our second rap down the chimney and a final rap off the chains to the base of S. Arete. There were a few small sections of snow to cross on the way back to the Y-Shaped larch tree. The three of us who had only worn rock shoes had to cross that snow, moccasin style, crab walk style, whatever you call it crossing steep snow in rock shoes.
Timing: I had expected the climbing to take about five hours, but three teams are slower than one or two. So it actually took about 8 hours from base to top for all three teams, and 14 hours car to car. The first team could have gone much faster, but I kept them waiting at belays to help keep the whole team together on the route, be able to deal with emergencies, adjust teams, etc. Without any other teams on the route, it was easy to do so. I don't like those climbs where the first team flies up and spends three hours on top, waiting for the other team(s). We didn't have any emergencies and didn't need to change-up the teams. Everyone moved well on each pitch, especially after we got past the first two 5.8 pitches. Those alone took about 3 hours to get all three teams above them. A few of the belay ledges barely had room for two teams, and we had to get creative to share space, adjust anchors, and make room for others.
- 5:30 - met at trailhead
- 6:00 - Hiking up
- 8:00 - First team began climbing
- 4:00 -- About when the first team reached the top.
- 4:40 -- final team reached the top.
- 5:00 -- started down the S. Arete
- 7:00 -- Reached the base of S. Arete
- 8:00 -- Reached the trailhead.
14 hours car to car -- We did not set a record, but had a great day!
Key gear -- a #4 and #5 camalot. At least one #3. Doubles from 0.5 to 2", and a mix of smaller cams below that. Five to six double slings. I did use some small tricams and some nuts in my anchors, saving cams for the climb. Radios helped keep all teams in communication, share beta with others, and generally keep track of everyone.
We had crampons for the approach, but didn't use them. We spent a lot of time on snow, but with morning temperature of about 47 and decent steps kicked in already, we didn't need the crampons at all.

Photo Credits: Brian Starlin, Emma Agosta, Fritz Stugren,
 Brian Starlin